
|
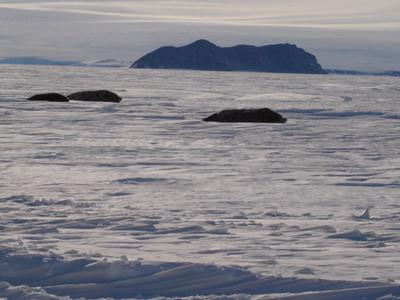
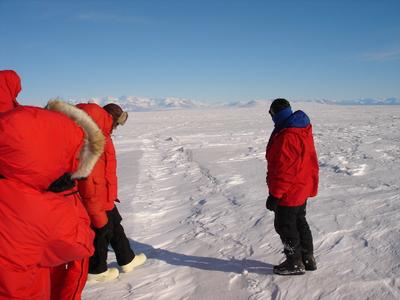
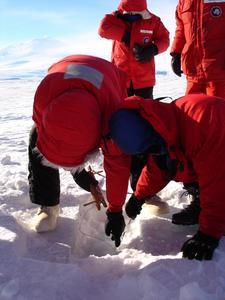
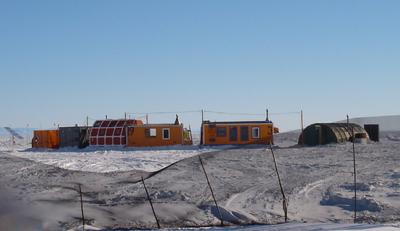
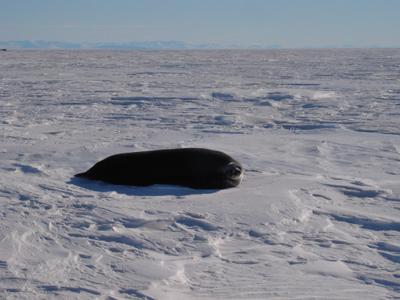
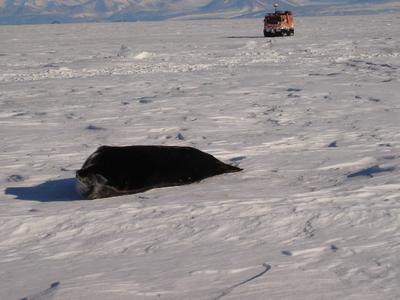
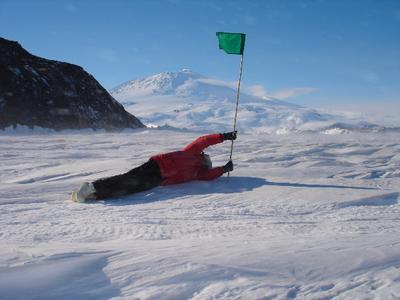
18 October, 2004It is a really bad idea to fall into a crack in the sea ice. Not that I have done this, of course, but today Mike and I went to Sea Ice class to learn how to keep both oneself and vehicles out of cracks in the ice. This class was after the 8:00 class the whole group had for ski-doo (snowmobile) training. We are learning more every day! First, Brennen, our instructor, gave us a classroom talk on the ice that forms off McMurdo Station and around Antarctica. The sea ice changes throughout the year. As the 7C1 students at Thompson know, so much ice is added in the winter that the size of the "continent" (including the ice) doubles. As the temperature changes, and tides, currents and swells move the ice around, pieces of ice push against one another or against land, and there is a lot of tension in the ice. The result is that it cracks. There are four different kind of cracks: pressure ridges - two big pieces of ice push against each other and end up pushing up into the air tidal cracks - caused by changes of about 3 feet vertical distance in tides straight edge cracks - the ice breaks once and releases tension working cracks - the crack is actively breaking and changing Cracks can be very thin or so wide that there is open water in them. Some can appear small, but hide a wide, slushy area underneath. It's very important when traveling on the sea ice to be constantly looking for cracks, and, if any look as though they may be dangerous, to check them by drilling to see how thick the ice is and whether it's dry and hard or slushy. The basic rule is that if the ice is less than 30 inches thick, it's only safe to cross if the crack is narrower than 1/3 the length of the vehicle track. So for example, if our Hagglund's track (the band that it has instead of wheels) is 9 feet long, then the crack must be at least 3 feet wide, or it is unsafe to cross. A good way to tell from a distance where there might be big cracks is to look for seals. When seals are in the middle of the ice with no open water visible around, there is almost certainly a crack nearby. Today we saw three big Weddell seals hauled out on the ice, indicating that there was a crack near them. Some cracks can been seen just by looking at the ice. Regardless of how you find the crack, however, if you are concerned that it may be an active crack, you should see how deep the ice is by drilling one or more holes before you decide to take a vehicle that weighs several tons over it. You can use a hand drill or one with a small motor. The one with the motor is a lot faster, but using the hand crank drill will keep you warmer because it's hard work. If the powdery ice being pushed up by the drill is too dry to make a snowball, the drill is probably not near water. As it starts getting nearer the water, slushy ice will start getting turned up by the drill. The drill has a series of meter-long "flights" (like a flight of stairs). Once you've drilled down to the bottom of the first flight, you remove it and add a second flight, then as many as necessary after that. The ice at this crack was 2.4 meters thick. Our destination while traveling around the sea ice was the "Penguin Ranch," a research camp where scientists study how Emperor penguins dive. The penguins are captured near the ice edge, then brought to the ranch, where they live in a fenced-in area and can access the water through a hole in the ice. The scientists fit them with instruments that measure the depth they dive, along with their heart rate and oxygen use. The penguins aren't there right now, but we got to see where they are kept. On the way back from the penguin ranch, we walked along the crack we had drilled, toward the seals, to see if we could see their diving hole. We walked very cautiously and at a distance so as not to disturb them. We could see there was a hole that had started with a crack and the seals had expanded it by chewing. There was even blood where the seals had injured themselves chewing on the ice. In addition to learning a lot about sea ice, Brennen, our instructor, showed us the ice screws and pitons that we would use to anchor a tent if we were stuck on the ice (for example, if the weather was too bad to travel). He also pointed out landmarks like the Royal Society mountain range, Tent Island and Inaccessible Island that Mike and I had seen on our trip to Cape Royds. This time, however, we went very close to Tent Island. The wind came up dramatically and I had to hold on for dear life to prevent being blown away.
Contact the TEA in the field at . If you cannot connect through your browser, copy the TEA's e-mail address in the "To:" line of your favorite e-mail package. |